How to Remove Unused WordPress Installations Left Behind in cPanel
 ajith
ajith
 June 27, 2025


 ajith
June 27, 2025
ajith
June 27, 2025
If you’ve been managing your website for a while, there’s a good chance you’ve installed WordPress more than once maybe for a test, a staging copy, or an old version of your site. But over time, unused installations can pile up, wasting server space, cluttering your account, and even posing security risks if outdated files are left behind.
In this article, we’ll walk you through how to safely identify and remove unused WordPress installations using cPanel, even if you’re not a technical expert.
Here are a few important reasons to clean them up:
Free up disk space: Unused files (themes, plugins, media, etc.) can eat into your quota.
Improve security: Outdated installations may contain vulnerable plugins or themes.
Reduce confusion: Cleaner file structure means fewer mistakes when managing your live site.
Avoid duplicate content or SEO issues if the site is accidentally still public.
Visit yourdomain.com/cpanel
Log in using the credentials provided by your hosting provider.
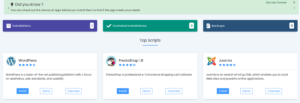
Option A: Use Softaculous or Installatron
If you installed WordPress using a one-click app installer like Softaculous, you can easily view all installations in one place:
Scroll down to Softaculous Apps Installer
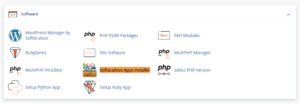
Click on WordPress
In the top-right, click the “All Installations” (box icon)

Review the list and note down the ones you no longer use
Option B: Check File Manager Manually
If you installed WordPress manually:
Go to Files > File Manager
Open the public_html folder and subdirectories
Look for folders that contain a structure like:
These are likely WordPress installations — verify which ones are inactive or test sites
Before deleting anything, always back up the folder just in case you change your mind or delete something important.
Right-click the folder in File Manager
Click Compress
Download the resulting .zip file to your computer
Once backed up:
Right-click the folder that contains the unused WordPress site (e.g., oldsite, testsite, etc.)
Click Delete
Confirm deletion (you can choose to skip the trash if you want it gone permanently)
WordPress sites run on MySQL databases. If you delete the files but leave the database, it continues to take up space.
To remove it:
Go to Databases > MySQL Databases
Under “Current Databases,” find the one that belonged to the removed site
Make sure it’s not being used by any other live site
Click Delete next to the database
Also check MySQL Users and remove any users not in use.
If you removed the files manually, Softaculous may still show the installation.
Open Softaculous > WordPress > All Installations
Click the red X icon next to the site you deleted
This will remove the reference from the installer dashboard
If the unused WordPress installation was installed on a subdomain (e.g., test.yourdomain.com) or an add-on domain, clean that up too:
Go to Domains > Domains
Find the subdomain or add-on you no longer need
Click Remove
Always double-check you’re deleting the correct installation
Label your folders clearly in cPanel so you can tell test from live sites
Periodically audit your hosting space for unused installations
Don’t forget to delete old backup files too if you’re cleaning up space
Keeping your cPanel account clean isn’t just about storage it’s about security, organization, and peace of mind. By removing unused WordPress installations, you reduce risks, free up valuable server space, and keep your hosting environment tidy and efficient.
Even if you’re not a developer, following the above steps will help you confidently manage your website environment like a pro.