How to Install WordPress Using Softaculous in cPanel: A Quick Guide for Beginners
 Samuel Lester
 June 14, 2025


 Samuel Lester
June 14, 2025
Samuel Lester
June 14, 2025
Launching your first WordPress website doesn’t have to be overwhelming. Thanks to Softaculous, a one-click script installer available in most cPanel environments, you can have WordPress up and running in just a few minutes no technical expertise required!
In this guide, we’ll walk you through the step-by-step process of installing WordPress using Softaculous in cPanel, so you can start building your website or blog with ease.
Before starting the installation, make sure:
You have access to your cPanel account.
Your domain name is pointing to your hosting server.
You’ve set up the domain inside your hosting panel (as a main or addon domain).
Visit your cPanel login page, typically something like:https://yourdomain.com/cpanel
Enter your username and password provided by your hosting company.
Once logged in, scroll down to the “Software” section.
Click on “Softaculous Apps Installer”.
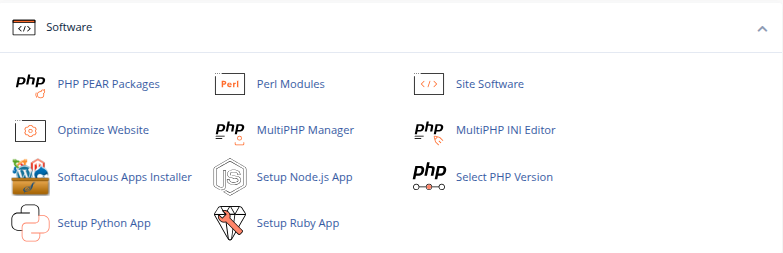
Tip: You can also search “WordPress” in the cPanel search bar.
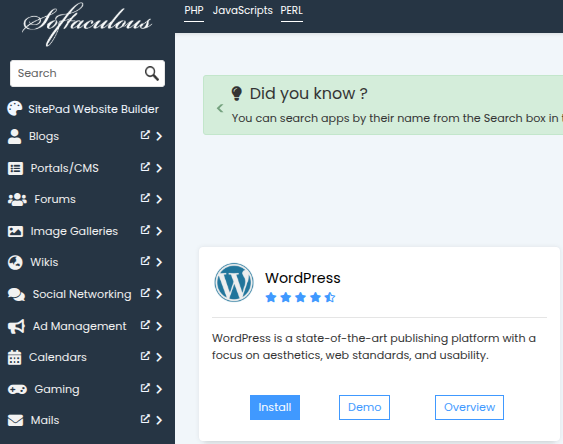
Inside Softaculous, find WordPress under the “Top Scripts” or “Blogs” section.
Click on the WordPress logo to begin the installation process.
You’ll now be taken to a setup screen where you need to configure your WordPress site:
Choose whether to install on http:// or https://.
Only choose HTTPS if you already have an SSL certificate installed.
Select the domain from the dropdown.
Leave the “In Directory” field empty if you want WordPress on your main domain (e.g., yourdomain.com).
Otherwise, enter a folder name like blog to install it at yourdomain.com/blog.
Site Name: Your website’s name (can be changed later).
Site Description: A short tagline or description.
You can leave “Enable Multisite” unchecked unless you know you need it.
Admin Username: Change it from “admin” for security.
Admin Password: Use a strong password.
Admin Email: Make sure this is a valid email for password resets.
Select your preferred language (e.g., English).
You can optionally pre-install plugins like Limit Login Attempts or Classic Editor.
Click to expand if you want to:
Rename your database.
Set up automated backups (recommended).
Choose update settings (e.g., auto-update plugins/themes).
Click the “Install” button at the bottom of the screen.
Wait a few seconds while Softaculous installs WordPress for you.
Once installed, Softaculous will show you:
Admin URL (e.g., yourdomain.com/wp-admin)
Website URL
You can now log in with your admin credentials and start customizing your site!
Now that WordPress is installed:
Choose a theme that matches your style.
Install essential plugins for security, performance, and SEO.
Start creating pages and posts for your visitors.
Q: Can I install WordPress in a subdirectory like /blog?
Yes! Just enter “blog” in the “In Directory” field during setup.
Q: What if I already have a site on my domain?
Installing WordPress on the same domain will overwrite existing files. Backup your data first or use a subdomain.
Using Softaculous in cPanel makes installing WordPress effortless even for total beginners. Whether you’re launching a blog, portfolio, or small business site, this quick installation method gets you up and running fast so you can focus on building and creating.