How to Edit .htaccess Safely from cPanel
 ajith
ajith
 June 20, 2025


 ajith
June 20, 2025
ajith
June 20, 2025
The .htaccess file is a powerful configuration file used by Apache servers (which most shared hosting platforms, including cPanel, run on). It controls various aspects of your website’s behavior such as URL redirections, access restrictions, permalink structure, and more.
However, editing .htaccess incorrectly can break your site, cause 403/500 errors, or lock you out entirely. That’s why knowing how to safely edit the .htaccess file via cPanel is an essential skill for website owners and WordPress users.
In this article, you’ll learn step-by-step how to access, edit, and back up your .htaccess file from cPanel, without any coding experience.
The .htaccess file (short for “hypertext access”) allows you to set server-level rules for your website.
It is located in the root directory of your site (e.g., public_html).
WordPress automatically uses .htaccess to manage pretty permalinks.
It’s also used to:
Redirect URLs (301 or 302)
Deny IP addresses
Force HTTPS
Enable caching and compression
Protect sensitive directories
Before making changes:
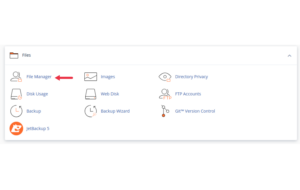
Go to cPanel > File Manager
Navigate to public_html
Right-click on .htaccess and choose Download
This saves a copy of your working configuration. If anything breaks, you can restore it immediately.
Access your hosting account and locate the cPanel login from your client dashboard. Most hosts provide a direct link in your welcome email or account portal.
In cPanel, scroll down to the Files section.
Click on File Manager.
This opens your website’s directory structure.
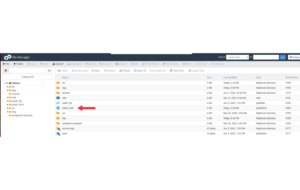
In File Manager, go to the public_html/ folder (this is the root for most websites).
If you don’t see .htaccess, click Settings in the top-right corner and:

Enable “Show Hidden Files (dotfiles)”
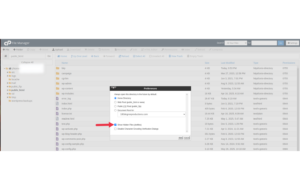
Click Save
You should now see .htaccess listed.
Right-click on .htaccess
Choose Edit
A popup may ask for character encoding leave it as utf-8 and click Edit
Now you can view and modify the contents in a plain text editor.
You can now add or modify rules. Here are a few safe and common examples:
Tip: Never remove existing WordPress permalink rules unless you know what you’re doing.
After making changes:
Click Save Changes (top-right)
Close the editor
Visit your website in a new tab to confirm it still loads properly
If something goes wrong after editing:
Go back to File Manager
Rename .htaccess to .htaccess-broken
Reload your site it should work with default settings
Log in to your WordPress admin
Go to Settings > Permalinks
Click Save Changes WordPress will regenerate a fresh .htaccess
Always back up before making changes
Avoid unnecessary edits stick to tested rules
Don’t use chmod 777 permissions on .htaccess
Validate your syntax (one wrong character can crash your site)
Add comments with # to describe your changes
Example:
The .htaccess file is a powerful ally when managed correctly. Whether you’re improving SEO with redirects, boosting security, or managing resources, you don’t need to be a developer to make useful changes.
Using cPanel’s File Manager, you can safely view, edit, and restore your .htaccess file without needing FTP access or third-party tools. Just follow a careful, backup-first approach and you’ll have full control over your site’s backend rules.