How to Block an IP Address from Accessing Your Website Using cPanel
 ajith
ajith
 July 2, 2025


 ajith
July 2, 2025
ajith
July 2, 2025
Running a website comes with its share of unwanted visitors from hackers trying to exploit vulnerabilities to bots draining your bandwidth or scraping your content. Fortunately, if you’re using cPanel hosting, you can block any IP address or range directly from the dashboard no need to be a security expert or edit any configuration files manually.
In this article, we’ll show you how to block an IP address using cPanel’s built-in tools so you can safeguard your website in just a few clicks.
Here are a few common reasons website owners block specific IPs:
Brute-force login attempts (e.g., someone trying to guess your WordPress admin password)
Spam comments or form submissions
Scraping content from your website
Abnormally high traffic from a single source
DDoS attempts or suspicious bots
Blocking specific countries or regions (when associated with threats)
Open your browser and go to yourdomain.com/cpanel
Enter your cPanel username and password provided by your hosting provider
Once inside your cPanel dashboard:
Scroll down to the Security section
Click on IP Blocker
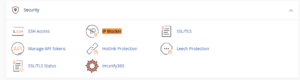
This tool allows you to deny access to your website from one or multiple IP addresses.
In the Add an IP or Range field:
Enter a specific IP address (e.g., 192.168.1.1)
OR a range using CIDR notation (e.g., 192.168.1.0/24)
OR a wildcard (e.g., 192.168.1.* to block all addresses in that range)
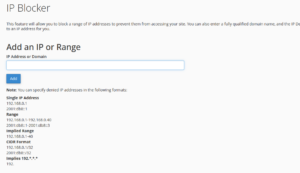
Click the “Add” button once done.
That’s it! The selected IP(s) will no longer be able to access your website.
Not sure which IP to block? You can check access logs in cPanel:
Go to Metrics > Raw Access
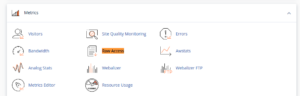
Download and open the access logs
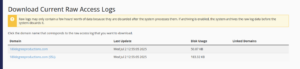
Look for repeated requests from the same IP, especially those accessing sensitive paths like /wp-login.php or /xmlrpc.php
Alternatively, if you’re using WordPress security plugins, they may log suspicious IPs you can then block from cPanel.
To view or remove previously blocked IPs:
Return to IP Blocker
Scroll to the section titled Currently-Blocked IP Addresses

Click Delete next to any IP you want to unblock
This is useful if you’ve accidentally blocked a legitimate visitor.
Be cautious when blocking IPs avoid blocking your own IP or that of search engines like Googlebot.
Blocking by IP is not always foolproof, especially with dynamic IPs or VPN usage.
It’s best used for known threats or repeated offenders.
If you’re unsure whether an IP is safe, search it online using tools like IPVoid or Whois Lookup.
While cPanel’s IP Blocker is effective, you can also consider:
Limiting access to sensitive areas like WordPress login with password protection (Directory Privacy in cPanel)
Using CAPTCHA on forms to stop bots
Adding .htaccess rules for advanced blocking (for technical users)
But for most users, the IP Blocker tool is quick, safe, and easy.
Blocking an IP address using cPanel is a simple yet powerful way to protect your website from spam, malicious attacks, or unwanted traffic. You don’t need any technical expertise just a few clicks in the right place, and you’re in control of who can access your site.
Regularly monitoring your logs and proactively blocking bad actors helps keep your website safer and more reliable for your real visitors.