How to Backup Your Website Using cPanel’s Backup Wizard
 Samuel Lester
 June 14, 2025


 Samuel Lester
June 14, 2025
Samuel Lester
June 14, 2025
When it comes to website security and uptime, regular backups are your first line of defense. Whether you’re running a small blog or managing a business site, having a backup ensures that you can recover your content in case of accidental deletion, hacking, or server crashes.
Fortunately, if your hosting provider uses cPanel, you have access to a simple yet powerful tool: the Backup Wizard. In this blog post, we’ll guide you through using this feature to create and download a full or partial backup of your website manually.
Automated backups are helpful but sometimes they fail, or you may want a copy stored locally for peace of mind. Manual backups let you:
Take a backup before making major updates
Store a copy off-site for disaster recovery
Transfer a website to a new host
Access your cPanel login URL, typically something like https://yourdomain.com:2083 or via your hosting provider’s dashboard.
Enter your username and password to log in.
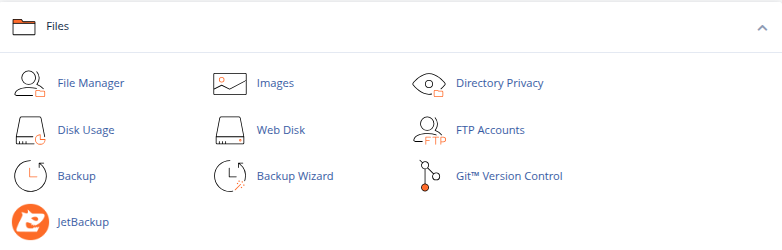
In the FILES section of cPanel, click on Backup Wizard.
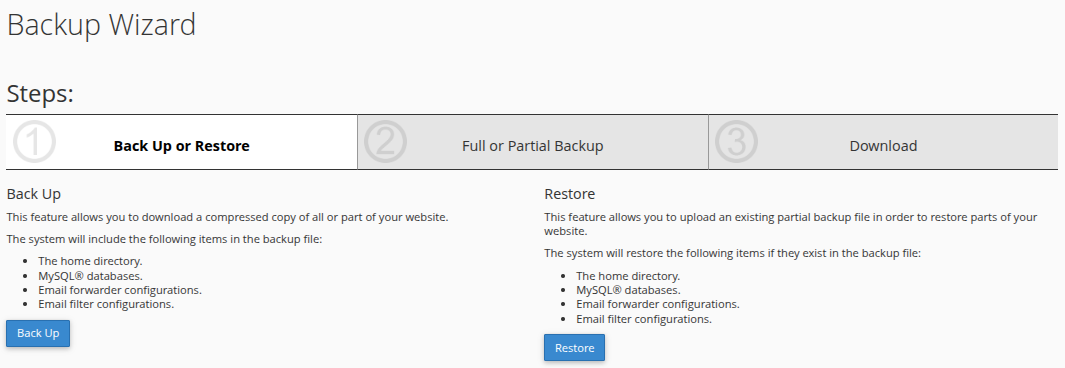
On the Backup Wizard welcome screen, click Backup to begin the process.
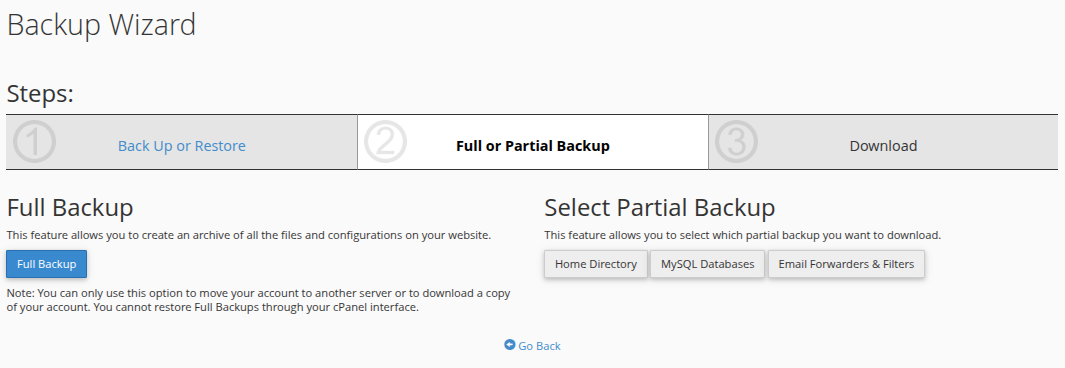
You now have two backup options:
Full Backup
Includes everything files, emails, databases, settings. Recommended if you’re migrating or want a full snapshot.
Partial Backup
Lets you backup:
Home directory (website files)
MySQL databases
Email forwarders & filters
For most users, Full Backup is the best choice. But if you’re just updating files or databases, Partial Backup may be quicker.
Choose Full Backup.
Set the Backup Destination:
Home Directory (safest and most used)
Enter your email address to receive a notification once the backup is complete.
Click Generate Backup.
After a few minutes (depending on your site size), you’ll get an email that your backup is ready.
Go back to Backup Wizard > Full Backup and click on the backup file link to download it (usually named something like backup-6.14.2025_10-00-00_username.tar.gz).
If you selected Partial Backup, you can download:
Home Directory (click to download .tar.gz file)
MySQL Databases (choose each database and download individually)
Email Forwarders & Filters
Simply click each button, and your browser will begin downloading the respective backups.
The Backup Wizard also helps you restore from a backup:
From the main screen, click Restore instead of Backup.
Choose what to restore: Home Directory, Database, or Email settings.
Upload the corresponding backup file.
Note: Full backups cannot be restored via cPanel. You must contact your hosting provider or use WHM if you have root access.
Always keep multiple copies of your backups one on the server, one on your local computer, and optionally one on cloud storage (like Google Drive or Dropbox).
Set a reminder to backup manually before plugin or theme updates if you don’t have automated backups configured.
Clean old backups regularly to save disk space on your server.
The Backup Wizard in cPanel makes it easy for anyone technical or not to safeguard their website with just a few clicks. Whether you’re preparing for a migration, update, or just want an extra layer of protection, using this tool is an essential part of responsible website management.
Remember: A single backup can save you from days (or weeks) of downtime. Don’t wait for disaster back up your site today!