How to Block an IP Address from Accessing Your Website Using cPanel
 ajith
ajith
 June 27, 2025


 ajith
June 27, 2025
ajith
June 27, 2025
If your website is getting unusual traffic, suffering from spam, or facing suspicious activity, one quick and effective action is to block the offending IP address. Fortunately, cPanel provides a built-in IP Blocker tool that lets you block specific IPs or even full ranges without touching a single line of code.
This step-by-step article will show you exactly how to block an IP address using cPanel, why you might want to do it, and how to manage blocked IPs later.
There are several good reasons you might want to block an IP address:
Someone is attempting to brute-force login to your WordPress site
You’re getting spam comments or fake form submissions from the same location
You want to restrict access from certain countries or regions
Your site is under heavy traffic from a suspicious user
You noticed unauthorized attempts in your logs
Blocking the IP gives you immediate relief and reduces resource load on your server.
To begin, log in to your hosting account’s cPanel. You can usually access cPanel by going to:
Enter your username and password provided by your hosting provider.
Once inside cPanel:
Scroll down to the Security section
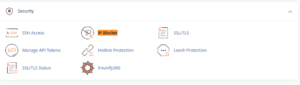
Click on IP Blocker (also labeled as “IP Deny Manager” in some themes)
This opens the screen where you can add IPs to your block list.
In the input box labeled “Add an IP or Range”, you can enter:
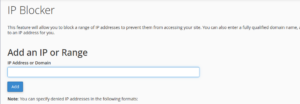
A single IP address like 192.168.1.1
A range like 192.168.1.1-192.168.1.255
A subnet like 192.168.1.0/24
A domain name (cPanel will resolve it to the IP)
Example:
To block one spammer’s IP, enter:
Click Add.
That’s it this IP address can no longer access your website.
If you ever want to unblock an IP, you can scroll down to the list of currently blocked addresses and click Delete next to any entry.
This is useful if you accidentally block a legitimate visitor or want to test something.
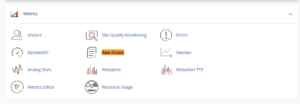
If you’re not sure which IP is causing issues, try:
Checking your cPanel > Metrics > Raw Access Logs
Looking at WordPress activity logs
Reviewing form submissions or security plugin alerts
Watching Spam or login attempts reports
Make sure the IP is consistently abusive before blocking.
When someone from the blocked IP tries to access your website, they will see a 403 Forbidden error. They won’t be able to load any content including your homepage or admin area.
However, blocking an IP does not block their email, FTP access (unless managed), or stop them from using VPNs or proxies. It’s a simple and effective first line of defense, but not foolproof.
Block only known abusers not random visitors.
Never block your own IP (check it on whatismyip.com).
Don’t block search engine crawlers like Googlebot your site may lose visibility.
For more serious attacks, consider blocking IP ranges, but be cautious this can affect legitimate users too.
cPanel’s IP Blocker is a beginner-friendly tool that gives you control over who can view your website. Whether you’re fighting spam, preventing brute-force login attempts, or just want peace of mind, this feature provides a quick and safe way to deny access to unwanted visitors.
No coding, no plugins just a few clicks in cPanel.